The Irresistible Magic of Roasted Garlic: A Comprehensive How-To Guide
Few ingredients undergo such a remarkable transformation as garlic when roasted. What starts as a pungent, sharp bulb emerges from the oven as a sweet, creamy, caramelized delicacy. This mellowed flavor and spreadable texture make roasted garlic a versatile culinary asset, capable of elevating everything from simple toast to gourmet dishes. If you've ever wondered about the secrets behind this simple yet profound cooking technique, you're in the right place. This comprehensive guide will walk you through the ultimate "roasted garlic how to," ensuring perfect results every time.
The beauty of roasted garlic lies in its simplicity. It requires minimal effort but yields maximum flavor. The high heat of the oven catalyzes a chemical reaction, breaking down the allicin (the compound responsible for raw garlic's sharp taste) and caramelizing its natural sugars. The result is a richer, deeper, and profoundly satisfying taste experience that’s a world away from its raw counterpart. Let's dive into mastering this essential kitchen skill.
Why Roast Garlic? Beyond Just Flavor
- Milder Taste: Roasting significantly reduces garlic's pungency, making it more palatable for those sensitive to raw garlic.
- Sweeter Profile: The caramelization of sugars brings out a delightful sweetness and nuttiness.
- Creamy Texture: The cloves become incredibly soft, almost butter-like, perfect for spreading or mashing.
- Digestibility: Many find roasted garlic easier on the stomach compared to raw garlic.
- Versatility: Its mild, sweet flavor allows it to be incorporated into a wide array of dishes without overpowering other ingredients.
The Essential "Roasted Garlic How To" Guide: Step-by-Step
Mastering roasted garlic is incredibly straightforward. Follow these steps for consistently delicious results.
Choosing Your Garlic
Start with fresh, firm garlic bulbs. Avoid any that feel soft, are shriveled, or have significant green sprouts emerging, as these indicate older garlic that may be bitter. Larger bulbs generally yield larger, creamier cloves, but any size will work.
Preparation is Key
- Preheat Your Oven: Set your oven to 400°F (200°C). This temperature allows for good caramelization without burning.
- Prepare the Bulb: Take a whole garlic bulb. Using a sharp knife, carefully slice off the top 1/4 to 1/2 inch from the head of the bulb, just enough to expose the tops of the individual cloves. This allows the oil to penetrate and the steam to escape during roasting. You can leave the papery outer layers on; they help protect the cloves.
- Drizzle with Oil: Place the trimmed garlic bulb on a piece of aluminum foil large enough to wrap it completely. Drizzle about 1-2 teaspoons of good quality extra virgin olive oil over the exposed cloves. The oil helps conduct heat, keeps the garlic moist, and contributes to the delicious flavor.
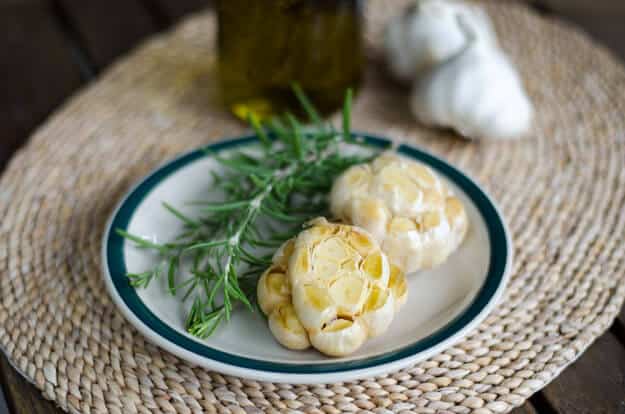
- Season (Optional): A pinch of salt and black pepper can enhance the flavor, though it's not strictly necessary. You can also add a sprig of fresh rosemary or thyme for an aromatic twist.
- Wrap It Up: Bring the edges of the aluminum foil together and crimp them tightly to form a sealed packet around the garlic bulb. This creates a steamy environment that helps the garlic cook evenly and prevents it from drying out or burning.
Roasting Methods: Oven is Your Best Friend
While there are alternative methods, oven roasting is the classic and most reliable approach. For a deeper dive into various methods and their nuances, including stovetop and air fryer techniques, check out our previous guide: roasted garlic how to - Article 1.
- Roast: Place the foil-wrapped garlic packet directly on a baking sheet (to catch any potential leaks) in the preheated oven. Roast for 30 to 60 minutes. The cooking time will vary depending on the size and freshness of your garlic bulbs. Smaller bulbs might be ready in 30-35 minutes, while larger ones could take up to an hour.
Knowing When It's Done
Your roasted garlic is ready when the cloves are soft, deeply golden brown, and easily squeezed out of their papery skins. You can carefully unwrap a bulb and gently squeeze a clove to test for tenderness. If it's firm, reseal and continue roasting.
Once roasted, remove the garlic from the oven and let it cool slightly. To extract the cloves, simply hold the bulb at the bottom and gently squeeze from the base. The soft, sweet cloves will pop right out!
Creative Ways to Use Roasted Garlic
Now that you've mastered the "roasted garlic how to," a world of culinary possibilities opens up. Its mild, sweet, and nutty flavor makes it incredibly versatile:
- Spreads & Dips: Mash it into hummus, add it to cream cheese or goat cheese for a savory spread, or simply spread it directly on crusty bread, crackers, or baguettes.
- Dressings & Sauces: Whisk it into salad dressings, blend it into a vinaigrette, or stir it into pasta sauces for an instant flavor boost.
- Mains & Sides: Incorporate it into mashed potatoes, stir-fries, risottos, or roasted vegetables. It's fantastic with roasted chicken or mixed into meatloaf.
- Compound Butter: Mash roasted garlic into softened butter with some fresh herbs for a delicious compound butter to use on steaks, fish, or bread.
- Soups: Add mashed roasted garlic to creamy soups (like potato or tomato soup) for an extra layer of depth.
- Marinades: Use it in marinades for chicken, fish, or vegetables to infuse them with its sweet, savory notes.
Mastering Roasted Garlic: Common Questions & Pro Tips
While the process is simple, a few tips can help ensure your roasted garlic is perfect every time.
Troubleshooting Common Issues
- Dry or Tough Garlic: This often happens if the garlic wasn't wrapped tightly enough, wasn't drizzled with enough oil, or was roasted for too long at too high a temperature. Ensure a good seal on the foil packet and use sufficient oil.
- Burnt Garlic: Too high a temperature or insufficient wrapping can lead to burning. If you notice it browning too quickly, lower the oven temperature or ensure the foil is tightly sealed.
- Undercooked Garlic: If the cloves are still firm and pungent, they need more time. Larger bulbs naturally take longer. Ensure your oven temperature is accurate.
Pro Tips for Success
- Don't Skimp on Oil: A generous drizzle of good quality olive oil is crucial for both flavor and texture. It helps the garlic cook evenly and prevents it from drying out.
- Batch Roasting: If you love roasted garlic, make a larger batch! You can roast several bulbs at once. Simply increase the amount of oil slightly and ensure each bulb has enough space in its foil packet. For more detailed tips and variations, our guide roasted garlic how to - Article 2 offers additional insights.
- Experiment with Herbs: Tuck in a sprig of fresh rosemary, thyme, or oregano with the garlic before wrapping for infused aromatic notes.
- Consider a Garlic Roaster: While not essential, a dedicated ceramic garlic roaster can be a convenient tool, often requiring slightly less foil and providing consistent results.
Storing Your Roasted Gold
Roasted garlic can be stored in an airtight container in the refrigerator for up to a week. For longer storage, you can mash the cloves and freeze them in ice cube trays with a little olive oil. Once frozen, transfer the cubes to a freezer-safe bag for up to several months. Always store roasted garlic covered in oil in the refrigerator and use within a few days due to potential botulism risks if left at room temperature.
Conclusion
The journey from a raw, pungent garlic bulb to a sweet, creamy, caramelized delight is a simple yet deeply rewarding culinary experience. By following this "roasted garlic how to" guide, you're now equipped with all the knowledge to consistently create this incredible ingredient. Whether spread on warm bread, mashed into potatoes, or blended into a vibrant sauce, roasted garlic promises to elevate your cooking with its unparalleled depth of flavor. So, grab a few bulbs, preheat your oven, and prepare to unlock the delicious magic of roasted garlic in your own kitchen!
